> ## Documentation Index
> Fetch the complete documentation index at: https://docs.gridshift.studio/llms.txt
> Use this file to discover all available pages before exploring further.
# Timeline
> The central workspace for arranging, editing, and mixing in Gridshift.
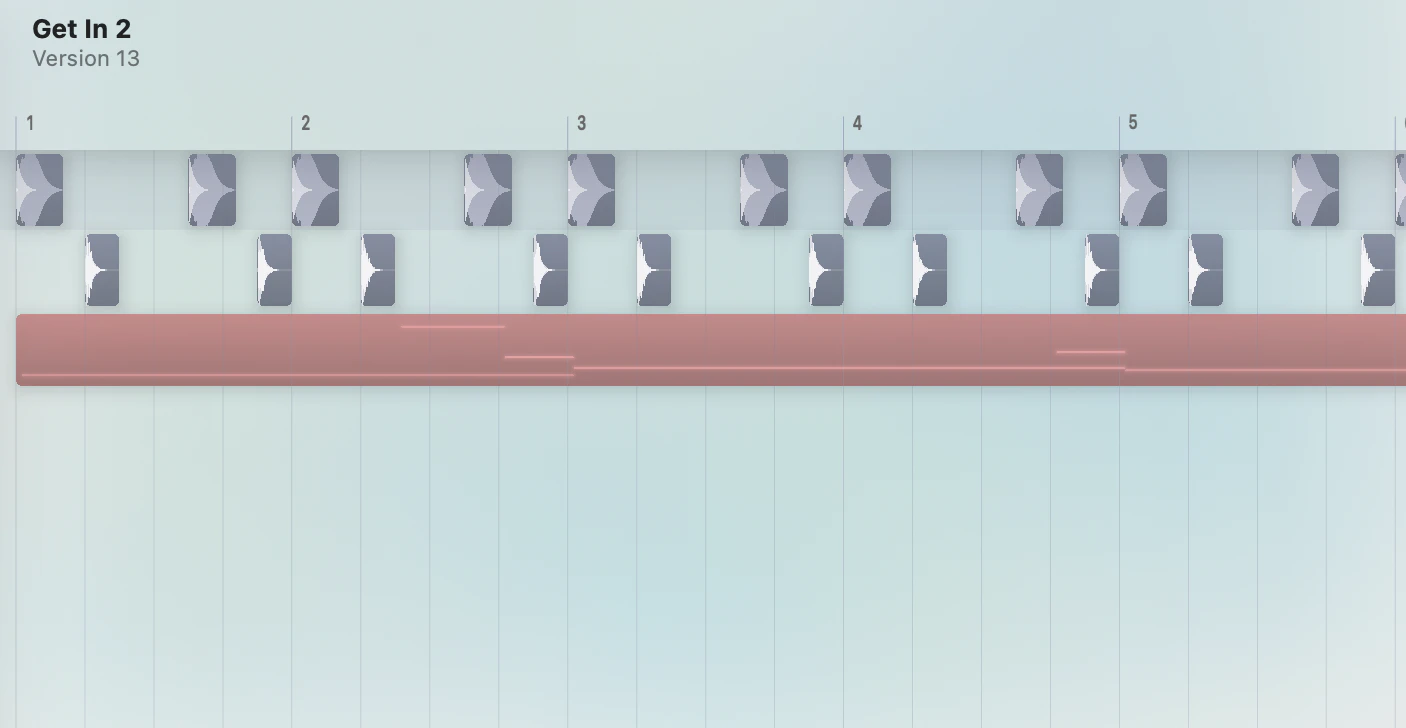
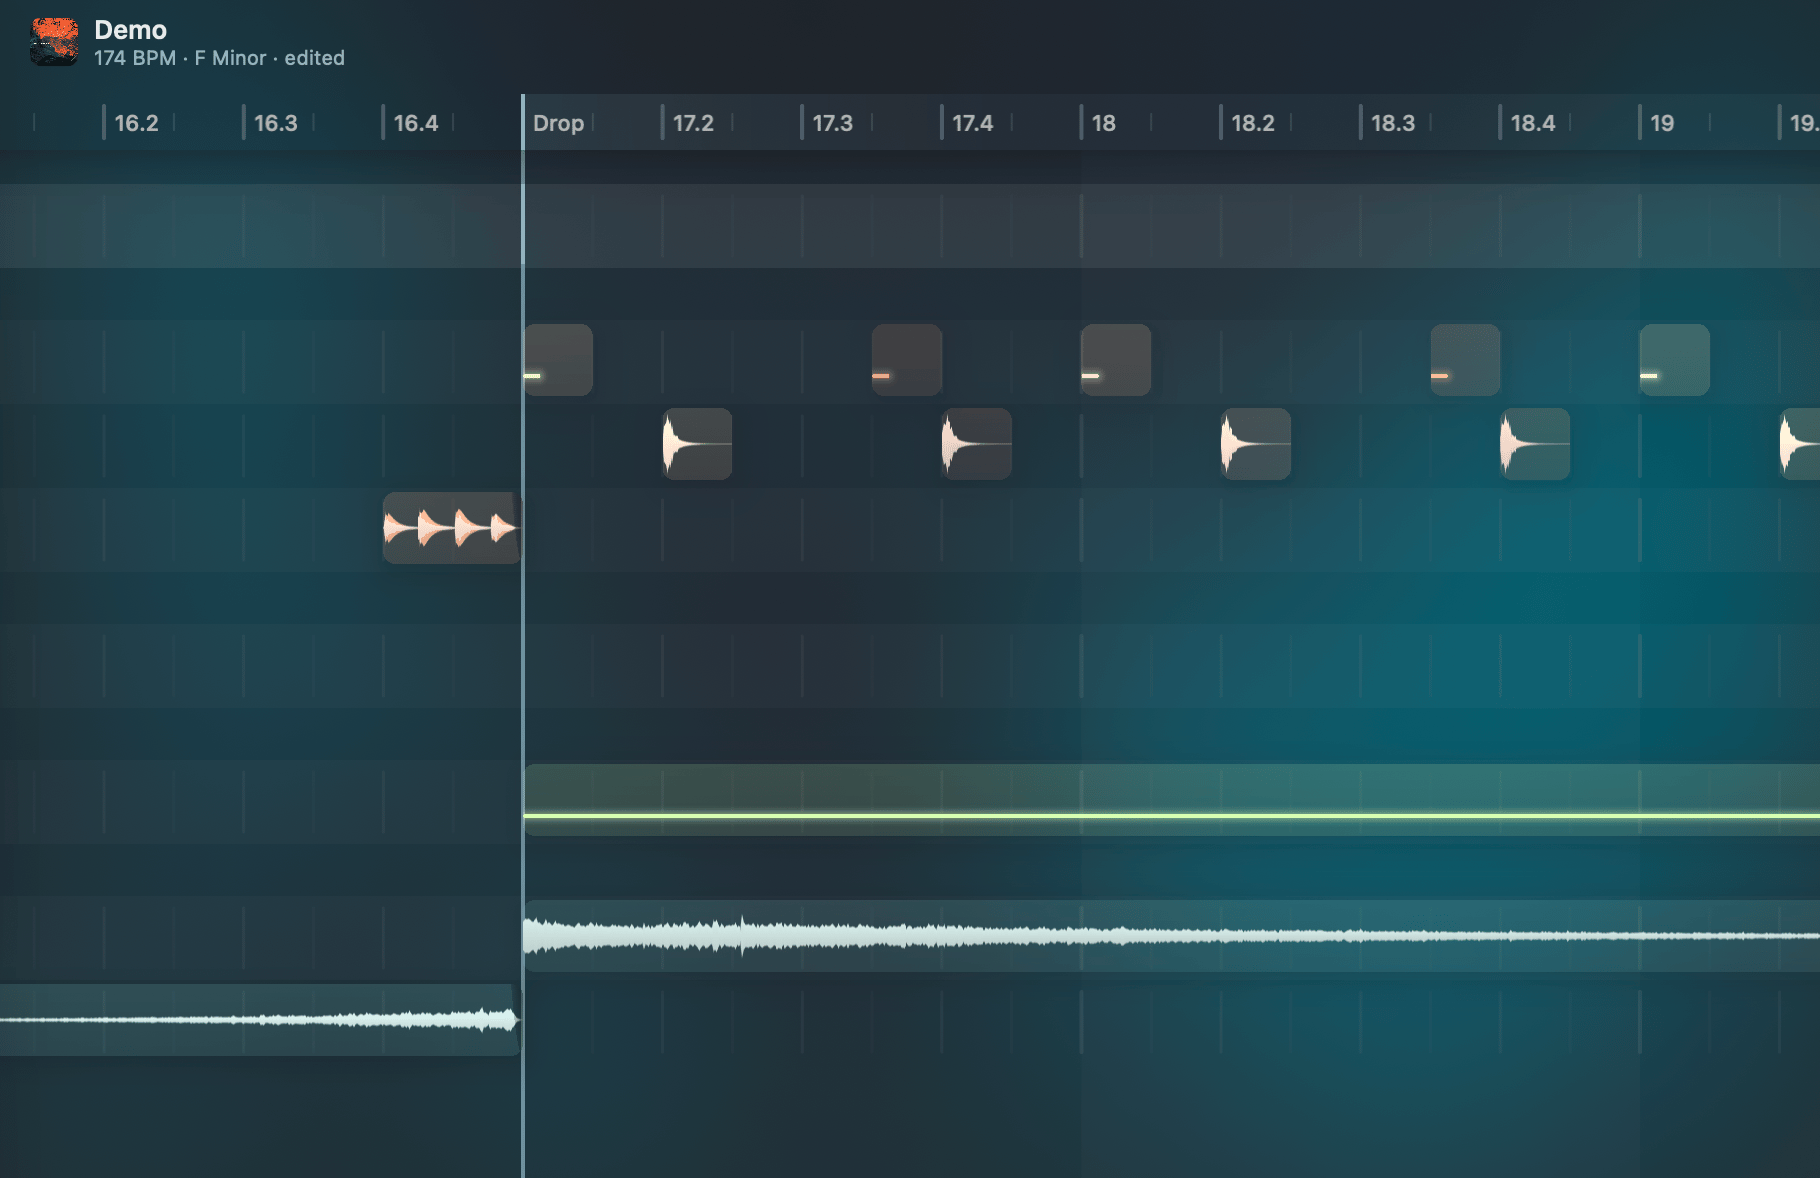
The **Timeline** is the central workspace. Tracks are stacked vertically, clips are arranged horizontally against a beat/bar ruler. Standard operations — drag, trim, split, copy, paste — work as expected.
 ## Track model
Each track has a single sound source — either an audio sample or an Audio Unit instrument — followed by an effects chain. One source, one chain, one output.
**Groups** act as summing buses for their child tracks. They appear in the sidebar track list but not as rows in the timeline — only tracks that contain clips are shown.
## Zoom levels
The timeline uses three fixed vertical zoom levels instead of free zoom: **Normal** (the default track height), **Compact** (`⌥↑`) for an arrangement overview at minimal height, and **Focus** (`⌥↓`) where a single clip expands for detailed editing.
## Focus Mode
Double-click a clip or press `⌥↓` to enter [Focus Mode](/features/focus-mode). This opens inline editing for the piano roll, audio slice playback, and automation curves. Press `Escape` or `⌥↑` to return to the arrangement view.
## Looping
A loop region repeats a section during playback. Toggle looping with `⌘L`. Use `⌘⇧L` to enable looping and zoom to the selected region. Looping is also used for [loop recording](/features/recording).
## Clip creation and deletion
Double-click an empty area of a track to drop a new clip there — an empty 4-bar MIDI or automation clip, or the track's sample at its natural length. It stays in the arrangement view (no Focus Mode), mirroring double-click-to-create-a-note in the piano roll.
`Enter` does the same at the edit cursor on the selected track. Mark a range first (drag across an empty area) and `Enter` sizes the new clip to exactly that range — on MIDI and automation tracks it makes an empty clip that wide, and on a sample track it trims the source to the range.
`⌘`+click creates or *stamps* clips and supports drag-to-size:
| Context | Result |
| ------------------------------- | ----------------------------------------------------- |
| No clip selected | Creates a new clip (empty MIDI or full-length sample) |
| Clip selected, compatible track | Stamps a linked duplicate of the selected clip |
Drag after a `⌘`+click to set the clip duration. New MIDI clips created with `⌘`+click automatically enter [Focus Mode](/features/focus-mode) for immediate editing.
Right-click a clip to delete it. Right-click and drag to erase multiple clips in one gesture.
## Linked Clips
Duplicating a clip with `⌘D` (or stamping one with `⌘`+click) keeps it **linked** to the original — editing the notes, the sample, the fades, or the gain on any copy updates them all. Use `⌘⇧D` to duplicate it **unlinked** instead. See [Linked Clips](/features/linked-clips) for the full behavior.
## Clip gain and normalize
Every audio clip carries its own gain value, independent of the track fader. Select one or more clips and press a number key to set the gain relative to that clip's own peak — `0` normalizes (peak reaches 0 dBFS), `1`–`9` scale that normalized peak down in 10 % steps, and the key left of `1` mutes.
Because each clip is measured independently, a mixed selection ends up at matching levels instead of sharing one global gain. MIDI clips are skipped. Time-stretched audio is measured across the full source span that actually plays, so sped-up drum loops normalize correctly. Boost is capped at +24 dB to keep very quiet tails from being amplified into walls of noise.
Mute uses a dedicated flag, so unmuting restores the previous gain value.
The number row does double duty: with no clip selected (or while recording) the same `1`–`0` keys retrigger and record the last note or slice you played at the chosen level. See [Number-Key Dynamics](/shortcuts/musical-typing#number-key-dynamics).
This is separate from **Normalize Track Volume** (`⌥N`), which sets the track fader using live playback peak data. Track normalize needs playback to have happened; clip normalize measures the source file directly and works without playing first.
## Solo dimming
When any track is soloed, non-soloed tracks are visually dimmed in the timeline. This makes it easy to see which tracks are active at a glance. The dimming applies to both clips and waveforms — soloed tracks keep their full brightness while everything else fades back.
## Grid and snapping
The grid resolution adapts to the horizontal zoom level. All operations snap to the grid by default. Hold `Option` while dragging for half-step precision.
## Groove
A groove template shifts the timing grid to create swing or shuffle feels. Configure groove in the `Project` inspector tab (`⌘5`) under `Grid`:
* **Template** — 38 presets across categories: Swing, Triplet, Hip-Hop, Funk, Breakbeat, and Complex
* **Amount** — 0–100% intensity of the groove offset
See [Groove & Swing](/features/groove) for details.
## Shortcuts
The most-used timeline keys are below. The [Timeline Shortcuts](/shortcuts/timeline) reference has the complete grid — arrow-key navigation, marquee selection, moving, timestretch, and every modifier combination.
| Action | Shortcut |
| ----------------------------- | ------------ |
| Toggle looping | `⌘L` |
| Loop + zoom to selection | `⌘⇧L` |
| Compact / Focus zoom | `⌥↑` / `⌥↓` |
| Zoom in / out | `⌥→` / `⌥←` |
| Create clip on empty area | Double-click |
| Insert clip at cursor / range | `Enter` |
| Create or stamp clip | `⌘`+click |
| Duplicate — linked / unlinked | `⌘D` / `⌘⇧D` |
| Unlink clip | `⌘I` |
| Split at cursor | `⌘E` |
| Quantize selection | `⌘U` |
| Normalize clip gain | `0` |
| Scale clip gain | `1`–`9` |
| Mute / unmute clip | \`\`\` / `^` |
| Normalize track volume | `⌥N` |
## Track model
Each track has a single sound source — either an audio sample or an Audio Unit instrument — followed by an effects chain. One source, one chain, one output.
**Groups** act as summing buses for their child tracks. They appear in the sidebar track list but not as rows in the timeline — only tracks that contain clips are shown.
## Zoom levels
The timeline uses three fixed vertical zoom levels instead of free zoom: **Normal** (the default track height), **Compact** (`⌥↑`) for an arrangement overview at minimal height, and **Focus** (`⌥↓`) where a single clip expands for detailed editing.
## Focus Mode
Double-click a clip or press `⌥↓` to enter [Focus Mode](/features/focus-mode). This opens inline editing for the piano roll, audio slice playback, and automation curves. Press `Escape` or `⌥↑` to return to the arrangement view.
## Looping
A loop region repeats a section during playback. Toggle looping with `⌘L`. Use `⌘⇧L` to enable looping and zoom to the selected region. Looping is also used for [loop recording](/features/recording).
## Clip creation and deletion
Double-click an empty area of a track to drop a new clip there — an empty 4-bar MIDI or automation clip, or the track's sample at its natural length. It stays in the arrangement view (no Focus Mode), mirroring double-click-to-create-a-note in the piano roll.
`Enter` does the same at the edit cursor on the selected track. Mark a range first (drag across an empty area) and `Enter` sizes the new clip to exactly that range — on MIDI and automation tracks it makes an empty clip that wide, and on a sample track it trims the source to the range.
`⌘`+click creates or *stamps* clips and supports drag-to-size:
| Context | Result |
| ------------------------------- | ----------------------------------------------------- |
| No clip selected | Creates a new clip (empty MIDI or full-length sample) |
| Clip selected, compatible track | Stamps a linked duplicate of the selected clip |
Drag after a `⌘`+click to set the clip duration. New MIDI clips created with `⌘`+click automatically enter [Focus Mode](/features/focus-mode) for immediate editing.
Right-click a clip to delete it. Right-click and drag to erase multiple clips in one gesture.
## Linked Clips
Duplicating a clip with `⌘D` (or stamping one with `⌘`+click) keeps it **linked** to the original — editing the notes, the sample, the fades, or the gain on any copy updates them all. Use `⌘⇧D` to duplicate it **unlinked** instead. See [Linked Clips](/features/linked-clips) for the full behavior.
## Clip gain and normalize
Every audio clip carries its own gain value, independent of the track fader. Select one or more clips and press a number key to set the gain relative to that clip's own peak — `0` normalizes (peak reaches 0 dBFS), `1`–`9` scale that normalized peak down in 10 % steps, and the key left of `1` mutes.
Because each clip is measured independently, a mixed selection ends up at matching levels instead of sharing one global gain. MIDI clips are skipped. Time-stretched audio is measured across the full source span that actually plays, so sped-up drum loops normalize correctly. Boost is capped at +24 dB to keep very quiet tails from being amplified into walls of noise.
Mute uses a dedicated flag, so unmuting restores the previous gain value.
The number row does double duty: with no clip selected (or while recording) the same `1`–`0` keys retrigger and record the last note or slice you played at the chosen level. See [Number-Key Dynamics](/shortcuts/musical-typing#number-key-dynamics).
This is separate from **Normalize Track Volume** (`⌥N`), which sets the track fader using live playback peak data. Track normalize needs playback to have happened; clip normalize measures the source file directly and works without playing first.
## Solo dimming
When any track is soloed, non-soloed tracks are visually dimmed in the timeline. This makes it easy to see which tracks are active at a glance. The dimming applies to both clips and waveforms — soloed tracks keep their full brightness while everything else fades back.
## Grid and snapping
The grid resolution adapts to the horizontal zoom level. All operations snap to the grid by default. Hold `Option` while dragging for half-step precision.
## Groove
A groove template shifts the timing grid to create swing or shuffle feels. Configure groove in the `Project` inspector tab (`⌘5`) under `Grid`:
* **Template** — 38 presets across categories: Swing, Triplet, Hip-Hop, Funk, Breakbeat, and Complex
* **Amount** — 0–100% intensity of the groove offset
See [Groove & Swing](/features/groove) for details.
## Shortcuts
The most-used timeline keys are below. The [Timeline Shortcuts](/shortcuts/timeline) reference has the complete grid — arrow-key navigation, marquee selection, moving, timestretch, and every modifier combination.
| Action | Shortcut |
| ----------------------------- | ------------ |
| Toggle looping | `⌘L` |
| Loop + zoom to selection | `⌘⇧L` |
| Compact / Focus zoom | `⌥↑` / `⌥↓` |
| Zoom in / out | `⌥→` / `⌥←` |
| Create clip on empty area | Double-click |
| Insert clip at cursor / range | `Enter` |
| Create or stamp clip | `⌘`+click |
| Duplicate — linked / unlinked | `⌘D` / `⌘⇧D` |
| Unlink clip | `⌘I` |
| Split at cursor | `⌘E` |
| Quantize selection | `⌘U` |
| Normalize clip gain | `0` |
| Scale clip gain | `1`–`9` |
| Mute / unmute clip | \`\`\` / `^` |
| Normalize track volume | `⌥N` |